
(Image credit: Getty Images)
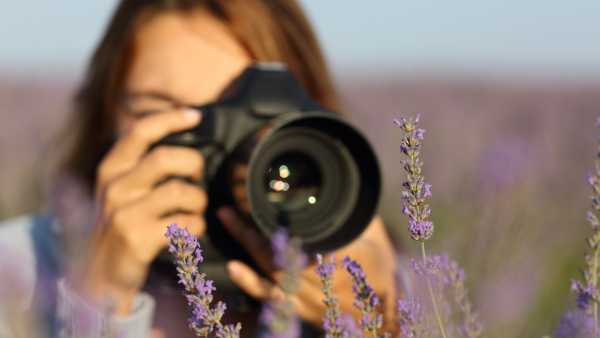
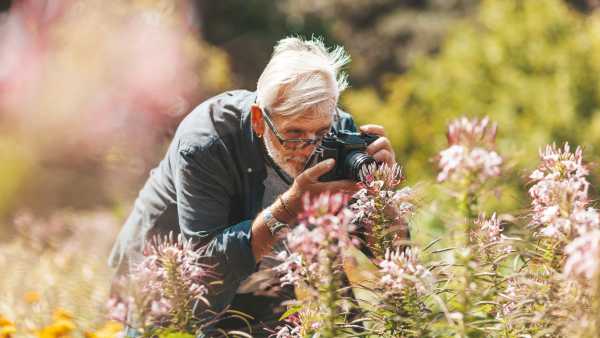
When you first experiment with macro photography, the genre can appear remarkably captivating. Instantly, typical items such as leaves, bugs, or even textures from household goods are transformed into something special when viewed closely through a macro lens. It’s a fantastic avenue to stimulate your inventiveness, yet it also presents its own distinct set of difficulties compared to alternative photographic approaches. Combining a macro lens with some of the top-tier cameras for animal photography, like the Canon EOS R6 II or the expert-geared Nikon Z8, broadens the possibilities greatly.
Here are five prevalent errors that beginners make in macro photography — along with some straightforward guidelines to assist you in steering clear of them.
1. Selecting the incorrect aperture

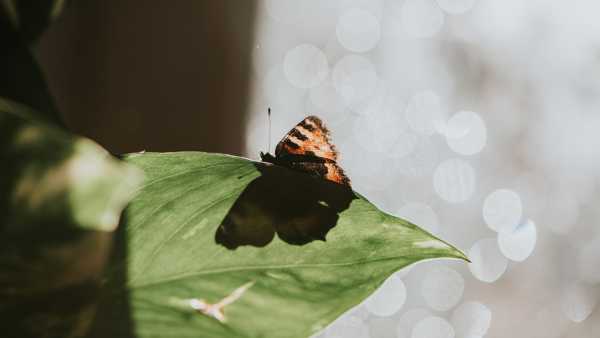
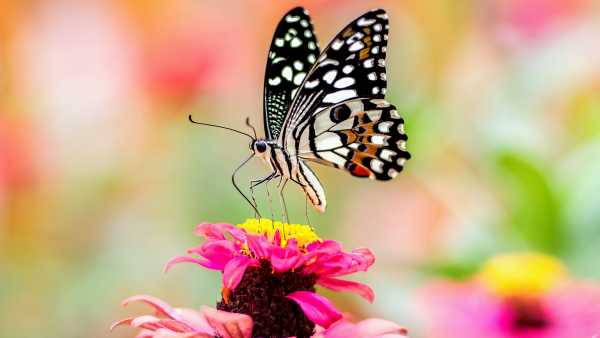
This image demonstrates how constricted the depth of field can be when capturing macro shots, even when employing smaller apertures.
A key initial challenge in macro photography involves navigating depth of field. At intimate ranges, it becomes exceptionally limited. Shooting with a wide aperture such as f/2.8 often results in only a narrow fragment of your focus being crisp — maybe just the extremity of a leaf or a section of an insect’s eye — while the remainder fades into unsharpness.
You may like
-

5 common errors beginner photographers of wildlife commit — and approaches to circumvent them
-

A beginner’s tutorial for macro photography
-

5 typical errors beginner astrophotographers make — and methods to avoid them
On the other hand, diminishing your aperture down to f/22 or smaller won’t inevitably resolve the issue. Even though it broadens the depth of field, diffraction (a blurring occurrence that arises at extremely small apertures) can deprive your shot of elaborate subtleties.
The optimal setting usually hovers around the center, approximately f/8 to f/11. At these values, you’ll secure sufficient depth of field to fully capture your subject, without sacrificing sharpness. Your aperture will also depend on the amount of available surrounding light.
Today’s best Sony FE 90mm f/2.8 Macro G OSS and Sony A7R V deals

Sony FE 90mm f/2.8 Macro G OSS

$1,098 $1,048ViewSee all prices

Sony A7R V

$4,199.99 $3,298ViewSee all pricesWe check over 250 million products every day for the best prices2. Neglecting the lighting
Occasionally, establishing shadows intentionally can be an artistic choice, but before venturing into experiments, strive for consistent lighting across your complete picture.
Illumination consistently holds importance in photography, yet it’s especially complex when operating at a reduced distance from your object. Capturing images outdoors under intense sun rays might seem optimal, but it frequently yields stark shadows and overexposed highlights that dominate your object’s subtle characteristics. Conversely, poor lighting can compel you to employ slower shutter speeds, thereby introducing blur.
The resolution involves regulating your light as effectively as feasible. Ensure you’re not capturing any severe shadows in your shot, and avoid hindering light using your own body. A simple diffuser can soften harsh light, and a compact reflector can bounce light back onto your focus to lessen shadows. Even a plain white card or aluminum foil can perform surprisingly well as a makeshift reflector for beginners.
Today’s best Canon RF 100mm f/2.8L Macro IS USM and Canon EOS R6 Mark II deals

Canon RF 100mm f/2.8L Macro IS USM

$1,199ViewSee all prices

Canon EOS R6 Mark II

$19.99ViewSee all pricesWe check over 250 million products every day for the best prices3. Depending on autofocus

Ensuring the object’s eyes are sharp is crucial, and autofocus rarely achieves this accurately; thus, relying on manual focus is recommended.
Autofocus has evolved notably, but even the most efficient autofocus systems encounter difficulties with macro. Given that the focus range is severely constrained, your camera often locks onto an inappropriate segment of your subject. You might believe you’ve captured a perfect shot, only to discover upon review that key elements, such as the insect’s eyes, are blurred.
Hence, manual focus becomes an invaluable asset in macro photography. Through focus management, you can ensure the sharpest aspect of your picture is precisely where intended. The utilization of live view and focus peaking simplifies this even more, providing a precise view of the image area in focus. You also have the option to subtly adjust the camera to and fro — termed as ‘focusing with your feet’ — until the necessary area of your object is in focus, negating the requirement to adjust your grip on the lens to use the focus ring. This not only consumes time, but the action may scare away your focus.
If you’re serious about macro, explore the possibility of integrating a focus rail onto a tripod. This facilitates making subtle, accurate tweaks to your focus locale.
You may like
-
5 common errors beginner photographers of wildlife commit — and approaches to circumvent them
-
A beginner’s tutorial for macro photography
-
5 typical errors beginner astrophotographers make — and methods to avoid them
Today’s best Nikon Nikkor Z MC 105mm f/2.8 VR S and Nikon Z8 deals

Nikon Z MC 105mm f/2.8 VR S

$899.95ViewSee all prices

Nikon Z8

$4,299.95 $3,796.95ViewSee all pricesWe check over 250 million products every day for the best prices4. Belittling the effect of camera shake
Regardless of whether your subject is momentarily still, a quicker shutter speed is yet required to neutralize slight movements.
Blurriness from camera shake is the underlying cause of ill-defined photos — particularly in macro photography. With high magnifications, even the most subtle quiver — pressing the shutter, a blast of air, or simply breathing — can obscure your shot. Even though your object may remain motionless, that doesn’t indicate you are.
To resolve this, stability is vital. Using a tripod provides a dependable solution, but if you favor handheld capturing, confirm that you use image stabilization and aim for quicker shutter speeds than normally deemed essential. Utilizing burst mode might also increase your prospects of capturing a sharp shot — a quick burst speed serves as a crucial attribute in a number of the leading cameras for animal photography.
Today’s best Fujifilm XF80mm f/2.8 R LM OIS WR Macro and Fujifilm X-T5 deals

Fujifilm XF80mm f/2.8 R LM OIS WR Macro

$1,399ViewSee all prices

Fujifilm X-T5

$1,869.95ViewSee all pricesWe check over 250 million products every day for the best prices5. Disregarding surroundings and structure
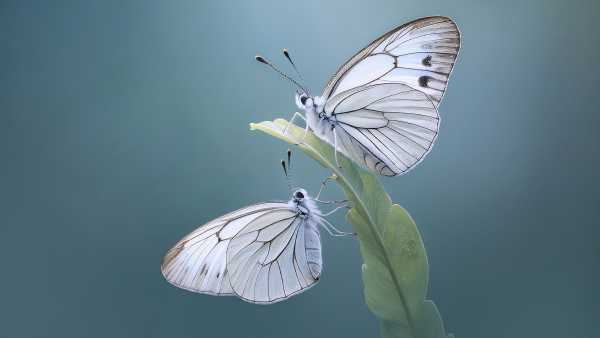
A tidy, simple structure lacking any distracting aspects in the background is attention-grabbing and aesthetically pleasing.
While zooming in on a very minute subject, it’s simple to overlook what lies behind — particularly because insects cannot be commanded to reside in your intended area. A disordered background comprising erratic blades of straw or radiant areas of brightness can totally overshadow your object. It’s simple to emphasize technical specifics and ignore your organization, which sustains equal prominence in macro photography as it does across any other genre.
Giving added consideration to the background improves your macro images, which is easier when operating with a stationary object, such as plants or household goods. While capturing insects, attempt repositioning yourself to diverse angles until a composition appeals to you. Furthermore, observe color contrast. A vibrant green insect on a green leaf will disappear, though shifting somewhat to capture it against a dark setting will enable it to become more pronounced.
Today’s best OM System M.Zuiko 90mm f/3.5 Macro IS Pro and OM System OM-1 II dealsSourse: www.livescience.com